 |
Many of our readers have probably already downloaded our latest free product,
SureThing Photo, but you may not have considered how to enhance your photo CDs
using SureThing CD/DVD Labeler. For this article I'm going to talk about how to
use SureThing CD/DVD Labeler to enhance your SureThing Photo backup, slideshow,
website and screensaver CDs.
After burning a backup disc in SureThing Photo, you can click the "Print
Label" button to print a label using the built-in SmartDesigns, but you may
want to create your own customized label. The program automatically copies the
backup disc information to the clipboard for just this purpose.
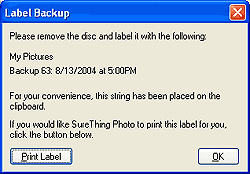
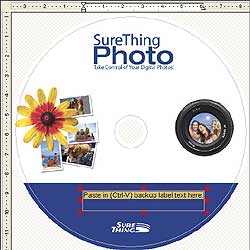
Just open your customized SureThing design file and paste (ctrl-v) the information
into a text frame. I've created my own SureThing Photo themed labels for this.
You can download them from here:
Now that the design file (*.std) is open, just place the cursor in a text frame
and paste (ctrl-v).
If you've used the clipboard at some point in between, just place the CD back
in the drive and use the "Backup>Label Backup Disc" option from within
SureThing Photo. Print the design and you are done. If you'd like to add this
design as your permanent SureThing Photo Backup template, just go to File>Save
As, and choose "Template" from the "Save As Type" pulldown
list. The label will now be available from the SureThing New CD Wizard in SureThing
CD/DVD Labeler.
If you are creating Photo CDs using SureThing Photo, you'll definitely want to
make use of SureThing CD/DVD Labeler's collage feature. This is an easy way to
display a sample of the photos on the jewel case insert or on the CD itself. After
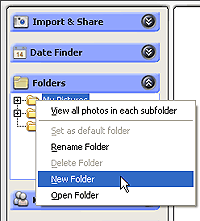
burning your web site, slideshow or screensaver CD, open the "Folders"
panel and right-click on your root folder. Choose "New Folder" and type
in a name.
Now select a good sample of photos for your collage. Try to use photos which best
represent the entire collection. A good tip here is to hold down the control key
to select or de-select multiple single images at once. Click and drag these photos
into the new folder.
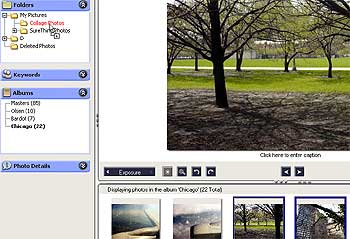
This will make them easier to find when you use SureThing CD/DVD Labeler to build
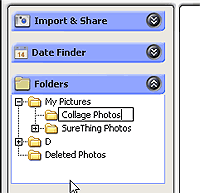
the collage. As you can see, I'm placing mine in a folder right below "My
Pictures", called "Collage Photos." Now open SureThing CD/DVD Labeler
and select your desired stock. Go to Backgrounds>Create a Collage and click
the "Select Images" button. Navigate to the folder you created and click
the "A" button to select them all.
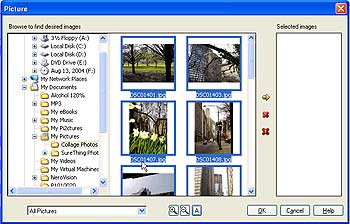
Now click the yellow arrow to choose them for the collage. Click OK, set your
grid size and click OK again. You'll see your label populated with the collage.
For my Jewel Case Front Insert, I've used the Backgrounds>Size & Position
command to shrink and center the collage, and then added text to the top and bottom.
Now we have our final photo collage front insert.
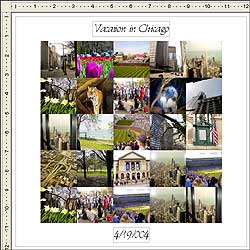
Pretty neat, eh?
|