 |


Here's a cool idea for a gift and holiday keepsake full of good cheer all rolled
into one! Design a holiday CD label and jewel case and burn a CD of seasonal
music (use the FreeBurn music
CD or your own music) or use your digital photos to create a photo CD. Mail it to your friends and
family as you would a traditional Christmas card. It may not be practical to
give to everyone on your list, but for family and close friends, it's
a keepsake they'll remember every time they play the CD.
It's pretty common for holiday cards to contain a recent photo (recent since
last year's card, that is). Family and friends will most likely appreciate seeing
your shiny, happy faces (and those of your kids, pets, etc.). The photos could
be from a recent family portrait, vacation or some other significant event during
the past year. For my holiday card, I've chosen to use some photos from my recent
honeymoon (well, not just my honeymoon... my wife was there too).
| Designing Your
Own Holiday CD Keepsake |
 |
| STEP 1 |
Select a good background
photo or image |
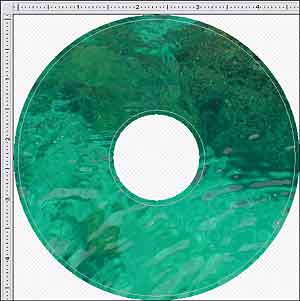
In SureThing, I first created a new label without
using SmartDesigns, and set my background using the "Use Your Own
Background" command.
For the background, I'm choosing a photograph that, at first glance, might
appear kind of ordinary. It has no identifiable subjects, and falls under
the category of "Photos I thought would look cool at the time, but
turned out kind of boring when the film was developed and I looked at
the prints" (if you're like me, you take LOTS of these types of photos).
But don't despair, such photos can make great background images. This
particular one was of a coral reef on the Big Island of Hawaii.
Note: I very purposefully chose a photo that did not contain people for
my background. The reason is because I want it to be a true background
and not the primary subject of the label. |
 |
| STEP 2 |
Add a photo of
yourself, spouse, kids, etc. |
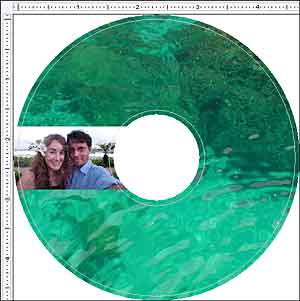
This step is important. Family and friends love to see
pictures of you and your loved ones, so don't deprive them of it! I'm
going to use a close-up photo of our darling subjects, and place it in
one of the four design areas.* It was taken at the same time and place
as the background photo, and the relationship of the two is readily identifiable.
 *
The center hole of a CD presents some interesting challenges for a designer.
It can be especially tricky when working with photographs of people. I
approach the CD not as a single canvas with a hole in the center, but
rather four separate design areas. I quite often create designs that don't
adhere to this system, but when I want an ordinary photo to look cool,
I find that placing it into one of the four areas and cropping roughly
according to the colored regions generates good results. *
The center hole of a CD presents some interesting challenges for a designer.
It can be especially tricky when working with photographs of people. I
approach the CD not as a single canvas with a hole in the center, but
rather four separate design areas. I quite often create designs that don't
adhere to this system, but when I want an ordinary photo to look cool,
I find that placing it into one of the four areas and cropping roughly
according to the colored regions generates good results. |
 |
| STEP 3 |
Add your holiday
message |
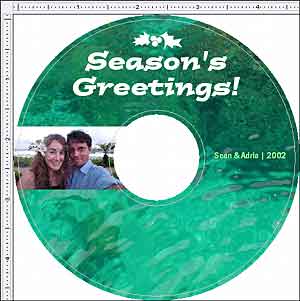
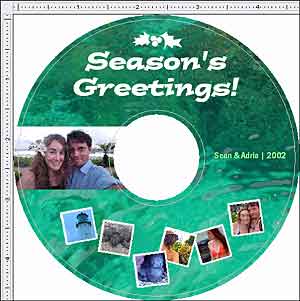
For the main greeting, I selected a font that was bold,
bouncy and happy, and I chose a light color to create as much contrast
between the background image and the text as possible. If you read Pete's
article in the previous issue of CDesign News, he presented some
really good tips for placing text on complex background images and
photos.
For accent, I selected a character from the freeware Christmas
Dingbats font to give it that mistletoe-y feel. It fits conceptually
(mistletoe at the top of the label), but it also helps fill out design
area #1.
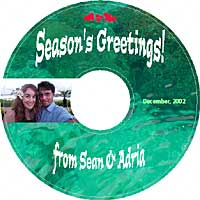 The
above example uses a standard text block with centered text, but I could
have also used some of the Text Effects, such as the Arched text at right. The
above example uses a standard text block with centered text, but I could
have also used some of the Text Effects, such as the Arched text at right.
However, this isn't the look I'm going for, and I have some other ideas
for how to design the bottom area of my holiday label. Read on! |
 |
| STEP 4 |
Embellish!! |
I designed this last effect to fill the #3 quadrant of
my design area (which you could have also done with a text effect such
as in the previous step), but I also wanted a way to display additional
photographs on my label. I decided it would look neat if I created the
appearance of Polaroid snapshots tossed haphazardly on the label, as they
might appear on, say, a coffee table.
 First
I selected the photos to use and inserted them to my label using the Picture
Tool. Then I scaled/cropped them all to the same size. You can make yours
larger or smaller. The size isn't as important so much as that you scale them
all to the same size. First
I selected the photos to use and inserted them to my label using the Picture
Tool. Then I scaled/cropped them all to the same size. You can make yours
larger or smaller. The size isn't as important so much as that you scale them
all to the same size.
 Then I used the Rotate tool and rotated each image in such a way to give
a random appearance. I overlapped a couple of the photos to enhance the
randomness (but notice in a general way that they still complete the design
quadrant, and more or less follow the contour of the CD).
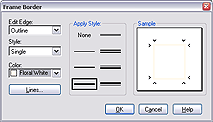 For
the coup-de-grace, I created a border around each photo to give the appearance
of snapshots or Polaroids. To do this, I simply double-clicked the image
to open its Properties dialog box, then clicked the "Set Border"
button, selected a line style and set its color to something white-ish. For
the coup-de-grace, I created a border around each photo to give the appearance
of snapshots or Polaroids. To do this, I simply double-clicked the image
to open its Properties dialog box, then clicked the "Set Border"
button, selected a line style and set its color to something white-ish.
All of the snapshots were from my honeymoon, which tied in thematically
with the rest of my holiday label design, but these could be pictures
of your kids, pets, whatever.
|
 |
| STEP 5 |
Create a jewel
case insert |
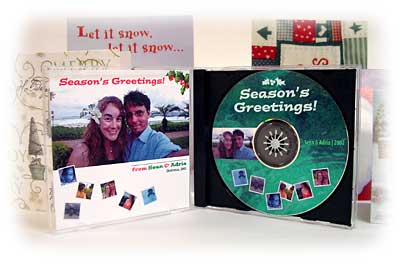
I created my jewel case using elements from the CD label
itself. The main photo, for instance, is the same one I placed in design
area #2 of the CD, but not scaled down quite so much, and the fonts are
the same, but in different colors. I added some clipart (the holly and
ivy) in the upper right corner, and repeated my Polaroid snap shot effect.
The white area below the main photo would also be a good place to write
your signatures, or a brief hand-written note to further personalize the
gift.
When I put the whole thing together, I was surprised how good it worked
as an actual holiday card. The jewel case sits perfectly on a mantle,
but you could also take the insert out of the plastic case and use it
as a standard card. Have fun with it! I certainly did. For some good ideas
on what to include on your CD, be sure to check out Pete's
article.
Here's wishing you a wonderful holiday season and a healthy, happy new
year!
— Sean Cavanaugh |
|


 *
The center hole of a CD presents some interesting challenges for a designer.
It can be especially tricky when working with photographs of people. I
approach the CD not as a single canvas with a hole in the center, but
rather four separate design areas. I quite often create designs that don't
adhere to this system, but when I want an ordinary photo to look cool,
I find that placing it into one of the four areas and cropping roughly
according to the colored regions generates good results.
 The
above example uses a standard text block with centered text, but I could
have also used some of the Text Effects, such as the Arched text at right.
 First
I selected the photos to use and inserted them to my label using the Picture
Tool. Then I scaled/cropped them all to the same size. You can make yours
larger or smaller. The size isn't as important so much as that you scale them
all to the same size.
 Then I used the Rotate tool and rotated each image in such a way to give
a random appearance. I overlapped a couple of the photos to enhance the
randomness (but notice in a general way that they still complete the design
quadrant, and more or less follow the contour of the CD).
 For
the coup-de-grace, I created a border around each photo to give the appearance
of snapshots or Polaroids. To do this, I simply double-clicked the image
to open its Properties dialog box, then clicked the "Set Border"
button, selected a line style and set its color to something white-ish.