 |


 |

Here are some cool ideas for gifts you can make! Select from the list below to
learn more.
#1 Design Your Own Holiday CD/DVD Keepsake
Here's an idea for a gift and holiday keepsake full of good cheer all rolled into
one! Design a holiday CD/DVD label and jewel case and burn a CD of seasonal music
(use the FreeBurn
music CD or your own music) or use your digital media (video, photos, etc.)
to create a photo CD, VCD or DVD. Mail it to your friends and family as you would
a traditional Christmas card. It may not be practical to give to everyone
on your list, but for family and close friends, it's a keepsake they'll remember
every time they play the disc.
For my holiday card, I've chosen to create a photo slideshow and include digital
video my wife and I shot during the past year, and assemble a DVD our friends
and family can play at home.
Supplies I used:
- SureThing CD/DVD Labeler 4.0+
- Blank DVD (or CD) media
- Full-faced CD/DVD labels
- Slim jewel cases
 |
| STEP 1 |
Select a good background
photo or image |
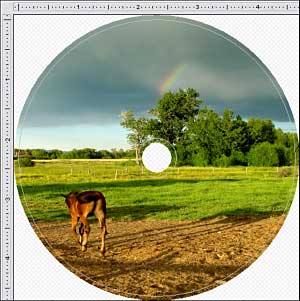
In SureThing, I first created a new label without using
SmartDesigns, and set my background using the "Use Your Own Background"
command.
I chose this particular photo from a recent vacation. It works well as a
background because the horizon line is well-defined and I was able to center
it along the diameter of the label, which gives a rectangular image a sense
of balance on a circular field. |
 |
| STEP 2 |
Add your holiday
message and text |
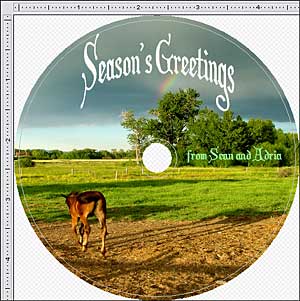
For the main greeting, I selected one of the fonts from the
font collection offered in
this month's edition of CDesign News. It's named (appropriately) "Christmas
Card," and has the exact It's-a-Wonderful-Life look and feel I'm trying
to achieve.
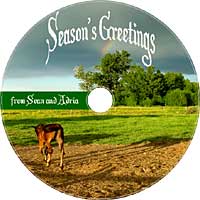 I
set the font color to "Floral White" for optimal contrast against
the clouds in the background, and used SureThing's "Arched Text"
effect. Your color choice will depend in large part on the colors and tonal
range of your background. Sometimes it's impossible to pick a font color
that works well on the background. In such cases, consider adding a rectangle
with a solid shade fill such as the example at right: I
set the font color to "Floral White" for optimal contrast against
the clouds in the background, and used SureThing's "Arched Text"
effect. Your color choice will depend in large part on the colors and tonal
range of your background. Sometimes it's impossible to pick a font color
that works well on the background. In such cases, consider adding a rectangle
with a solid shade fill such as the example at right:
I used the same font for the "from Sean and Adria" line I used
for the main greeting, but at a smaller size and with a different color
(as a general rule, I try not to use too many fonts in any given design,
but rather rely on size/color variations instead).
For accent, you might want to add some of the characters from the symbol
font HoliDings, such as mistletoe,
snowflakes, etc., to give it even more of a holiday feel. |
 |
| STEP 4 |
Add track titles
or instructions |
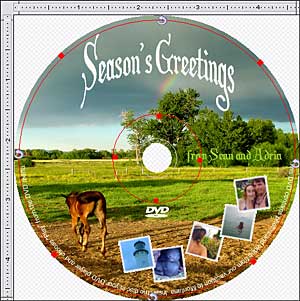
This might not be a necessary step, but I wanted to add some
text to let the recipient know this disc is in fact a DVD. There are a couple
of obvious ways to do that: Perhaps the simplest method is to include a
DVD logo in the design (which I did), but some people might require a bit
more instruction, so I created a Circular Text Effect to hold some basic
instructions (e.g., "This is a DVD containing photos and video you
can play on your computer or DVD player." etc.)
If the gift you're creating is a music CD, for instance, you might want
to consider adding song titles and artist names using the Circular Text
Effect tool. It's simple and unobtrusive.
I then rotated the text effect so that the text starts and ends with the
horizon line of the background photo. |
 |
| STEP 5 |
Create a jewel
case insert |
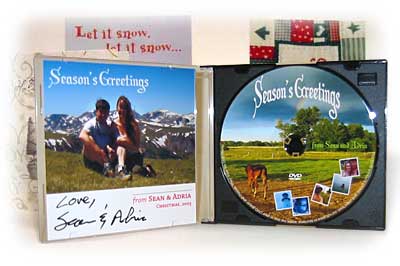
I created my jewel case using elements from the DVD label
itself, as well as other photographs contained in the slideshow presentation
on the DVD.
The white area below the main photo would also be a good place to write
your signatures, or a brief hand-written note to further personalize the
gift.
When I put the whole thing together, I was pleased by how well it worked
as an actual holiday card. The jewel case sits perfectly on a mantle, but
you could also take the insert out of the plastic case and use it as a standard
card. Have fun with it! I certainly did.
Here's wishing you a wonderful holiday season and a healthy, happy new year!
— Sean Cavanaugh |
|
|