 |


Pete's Tips & Techniques: Creating Cool Wrap Effects
One of the many powerful features in SureThing is the wrap feature. You have
probably already noticed certain SmartDesigns have this feature built-in, but
you may not have known how to use this feature for your own designs. We'll cover
two of the possible uses of this great feature below in our 2nd "Tips and
Techniques" article:
Using Wrap |
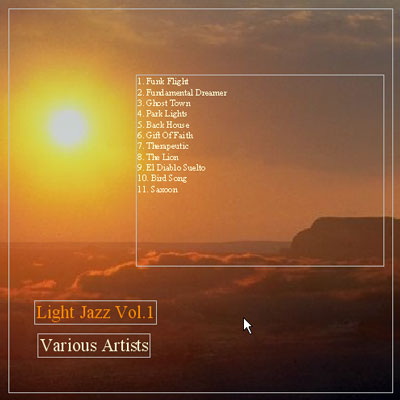
Below you see a design I made from scratch, using the "Light
Jazz" freeburn CD playlist:
 |
TIP 1 |
Wrapping to a circular object |
It would be nice to have the above track list curve around
the sun in the background image. The solution is to wrap around a circle
object. First, make sure the wrap option is turned on for the text frame
which contains the playlist.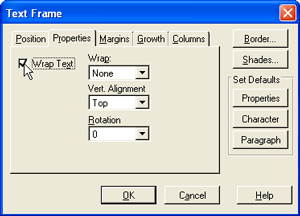 To do this, double-click on the frame while in object mode. Click the
'Properties' tab and be sure the 'Wrap' checkbox is checked. If this option
is grayed out, you will need to click on the 'Growth' tab and set the
'Horizontal' growth pulldown to "Fixed". (Note: When you create
a text frame using the "Create New Text Frame" option, wrap
is turned off by default. If you use the text frame tool, it will be turned
on by default.) Once you are sure that wrap is set, select the circle
tool from the tools pulldown on the control strip:
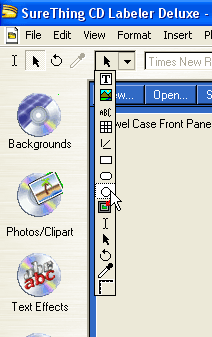
Now click and drag out a circle over the sun image in the background.
Double-click on the circle object to set its wrap and border properties.
First, we'll want to turn off the border, so that the circle does not
show on the design:
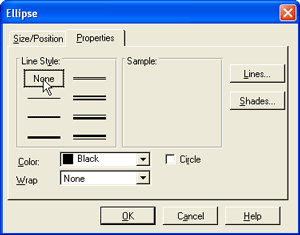
Then set the wrap pulldown to "Contour." This controls how objects
with the 'Wrap' checkbox checked will wrap around the circle:
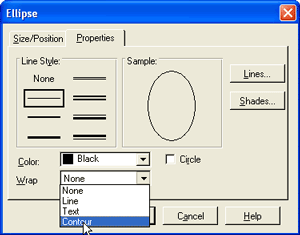
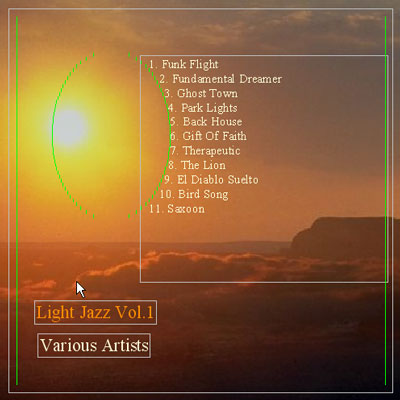
Click OK, and you'll see the text is now wrapping around the contour of
the circle object. You can see the wrap areas by pressing ctrl-shift-9:
 |
TIP 2 |
Wrapping text frames around each other |
Sometimes you will want to set text frames to wrap around
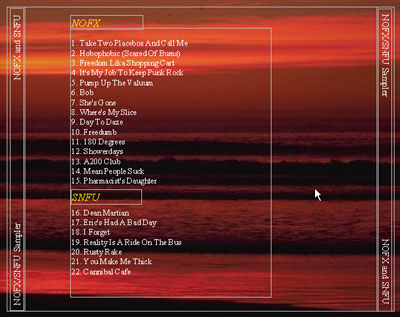
each other. Below is a back panel design for freeburnguide's
NOFX/SNFU sampler:
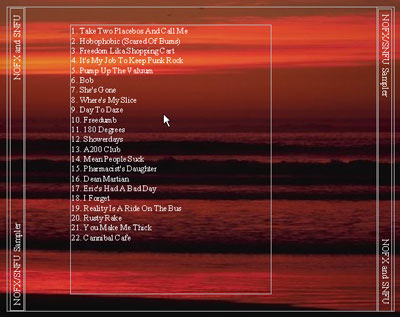
Since there are only two artists on this CD, we really don't need the
artist listed for every track. This is where text frame wrapping can come
in handy. The first 15 tracks are by NOFX, while the last 7 are by SNFU.
We'd like to insert the artist names in the flow of the track listing.
To do this, you'll want to create two text frames. Use the text frame
tool and type in the artist's names:
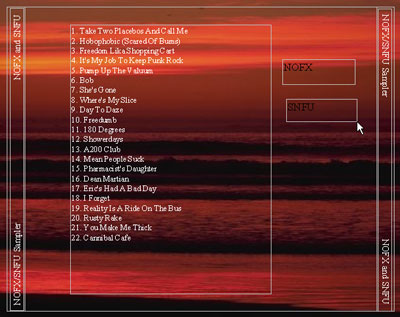
Now we've got two text frames, one for NOFX and one for SNFU. We are going
to want to place the NOFX frame at the top of the list, and then insert
the SNFU text frame in the middle of the list. We want the tracks above
and below the SNFU text frame to wrap to separate lines. Double-click
on the SNFU text frame, and select the 'Properties' tab. Set the 'Wrap'
pulldown to "Line":
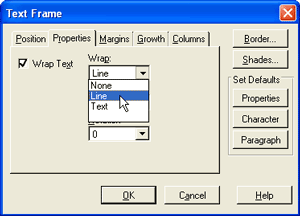
The "Line" option forces other objects to wrap to the next line.
If we had chosen, "Text", the tracks would wrap to the right
side of our frame.
Now we can drag the frames into position and adjust their color and font
style (remember the ctrl-click to select objects inside or behind other
objects....):
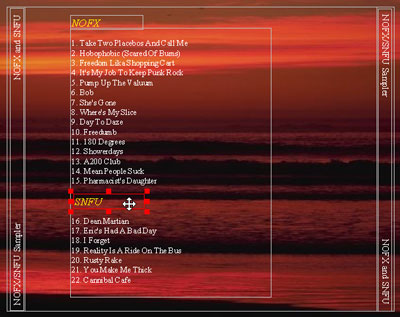
For fine adjustments we'll want to adjust the wrap margins. The easiest
way to do this is to click and drag them. Before we do this, however,
we'll have to turn on the feature to, "show wrap margins". Go
to Tools>Program Options. Check the checkbox for "Show text wrap
margins on objects", and click OK:
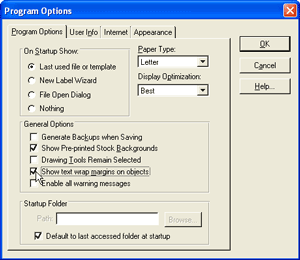
Now we can click and drag the wrap margins to suit our needs. Select the
text frame, and hover the cursor over the outer text frame border. It
will change to a dark gray double-tipped arrow. Clicking and dragging
this border will set the wrap margins for the frame:
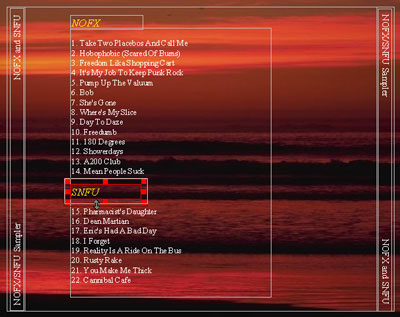
After a little fine tuning, and we are done!
 |
|