Shopping Cart
Review items in your cart and proceed to checkout
 ST5 - SureThing 5 specifc General FAQs
Q: What's New in Version 5 A: SureThing Version 5 offers everything that the earlier versions included and much more. As much as possible, all user's requests have been implemented. The User Interface has been overhauled and improved, without sacrificing familiarity and intuitive ease of use. Everything works better! The following features are available in SureThing CD/DVD Labeler Deluxe 5. Not all of these features are available in other versions of SureThing CD/DVD Labeler. Check Help > About to confirm which version of SureThing you are running. · Multi-label project files. This allows you to save, edit, and print your entire job using one design file. The new project types range from a single disc label to a combination of disc and case labels. · Coordinate layouts across labels. Changes to backgrounds, layouts, fonts, and playlists can be applied across all label types in the project. · Instantly add or remove label types with the new Project Label Types dialog box. · New and improved printing. The new Print Manager allows you to print to multiple printers/drives and queue-up future print jobs; all without slowing you down. No more waiting for long print jobs. · New WYSIWYG background and layout browser. Clicking the folder icon on the associated SmartDesign Variation gives you a preview of the background/layout as it will appear on the label. No need for trial and error. Just browse and choose. · Blend images and text with fully adjustable transparency options. Images, text, rectangles, ellipses, text effects, circular text, and background shades can all be adjusted. Choose solid, transparent or any point in between. Particularly useful for creating readable track listings or for alpha-blending different objects. · Direct-to-disc printing is enhanced. SureThing now automatically detects and configures CD Printers, allowing for out-of-the-box printing. · Improved label template interface. Drill-down three column sorting makes it much easier to find the template you need. Quickly select the media type, manufacturer and label type. No more long lists to sort through. · Improved Design Set user interface. One-click to add, delete and navigate designs. Controls are located right below the Design Window. · Selectable Themes. Choose from various themes to customize the look and feel of SureThing. · Improved background and picture browse features. One button switches between SureThing's background set and your own custom image folders. The new search button quickly finds your commonly used image folders. No need to remember where you stored those images. · One-click song titles import. A single click identifies your CD or DVD as a data, audio, or MP3 type and automatically displays the playlist on the design. · Quickly customize your displayed playlist information. The new Project Options button allows you to hide/show the entire playlist or add/delete specific playlist fields. Ex: playtimes, albums, artists, etc... » Top General FAQs Q: What version of SureThing do I have? A: This is a GREAT question. It is perhaps the first question you should ask yourself when you install SureThing. Once you have started SureThing click on Help, About. This will tell you the title, version number and Edition of the software you have. There are a few different flavors of SureThing out there, and each has it's own set of important variables. If you are in need of Technical Support, it is important to know these variables. SureThing CD Labeler 4.0 Deluxe Edition, is available from different retail stores throughout the US and Europe. It comes in a red, yellow and white box. This is the full Deluxe version of SureThing 4 program which includes all the templates, backgrounds and clipart that we have available. To update this version of SureThing go to the downloads section of the SureThing website and click on the link 'CD Labeler Deluxe - Updater'. The CD for SureThing CD Labeler 4 Deluxe looks like this... 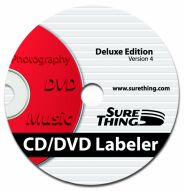 The CD for SureThing CD Labeler 3.0 Deluxe looks like this... 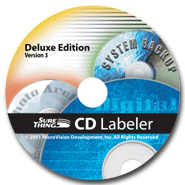
There is also an SE Version of SureThing CD Labeler 3.0. This version comes with the SureThing brand templates. It also includes all the backgrounds and clipart we have available as well as all the features of the Deluxe version, sans the template creation wizard and page setup option. Patches for SureThing CD Labeler SE Edition will be available in the download section of this website under the SE heading. The CD for SureThing CD Labeler 3.0 SE Edition looks like this... 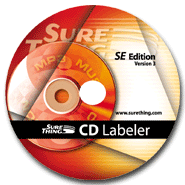
There are also various Starter (OEM) Editions of SureThing available from different companies. These versions are limited to templates available from the brand you purchase from. These versions also have a small set of backgrounds (usually between 30 to 50 backgrounds) and clipart. There are no patches or updates available for the OEM Editions of SureThing. However, if you won one of these starter editions you can purchase an upgrade to SureThing CD Labeler 3.0 for a small fee. Currently the SureThing Starter Edition (aka "First Edition") is available from these kits... Allsop DiscID, Recoton, CD Rappit, NEC, Xerox, Mirage, Macmillan, LabelMe, Champion, Bizcard, and Affex Printers. If you purchased the CD Stomper Kit, you have SureThing CD Labeler V 1.14. This is an older version of the SureThing software which is limited to the CD Stomper CD label and Jewel Case templates. » Top Q: How do I install SureThing CD Labeler? A: If your computer has a CD Auto-Run feature, once you insert the SureThing CD Labeler CD into your drive, you should see a window pop up. This window will give you an option to install SureThing CD Labeler. Click on that option and follow along with the directions of the Setup wizard. If your computer does not have a CD Auto-Run feature, when you insert the SureThing CD Labeler CD double click on the "My Computer" icon on your Windows Desktop. Now right click on the CD Rom icon and choose Explore. Now double click on the Setup icon. Follow along with the directions of the Setup wizard. » Top Q: Does SureThing CD Labeler work with Windows XP? A: Yes, SureThing does work quite well in Windows XP. However, during installation, it is important to remember that you must be logged on with Administrative rights in order to successfully complete the installation. You also need to reboot your machine after installing SureThing, even if it doesn't ask you to. » Top Q: Is there a SureThing CD Labeler version for Mac users? A: Unfortunately, the Deluxe SureThing CD Labeler 4 program is only supported under the Windows 98SE, ME, 2000, XP platform. However, if you have a Microsoft Virtual PC for Mac, then this will allow you to run PC-based programs such as SureThing on a Mac. » Top Q: Serial number... What serial number? A: The SureThing CD Labeler 4 program does not require a serial number to install the program. However, if you have a 2.0 version of SureThing, you will be required to enter a serial number before you install. Those who purchased a 2.0 version of SureThing CD Labeler should be able to find the serial number on a card inside the box, perhaps in the same zip lock bag that held the labels. The serial number can also be located on a sticker attached to the bottom of the applicator. If all else fails, you might want to look on the cover of the manual. Users of the CD Stomper, Starter Edition or any other limited version of SureThing need no serial number. There are no patches or updates available for these versions. » Top Q: Does SureThing CD Labeler 4 have a User's Guide? A: The SureThing User's Guide will be installed when the Deluxe SureThing CD Labeler 4 program is installed and added to the Windows Start menu. To access this Adobe Acrobat Reader PDF file, click on the Windows Start menu and select All Programs, SureThing, SureThing CD Labeler Deluxe 4 User Guide. This will open the User's Guide in the Adobe Acrobat Reader program if you have it installed. If not, then you can download a free copy at: http://www.adobe.com/products/acrobat/readstep2.html » Top Q: Since I own a previous version of the SureThing program, can I buy the latest Deluxe version at a discount price? A: Absolutely. Please visit the following link for more details on the upgrade offer: http://www.surething.com/ST/Category.asp?CatCode=DELUXE_UPGRADE » Top Q: Will my older design file format (*.dsn) be supported in SureThing 4? A: Yes, the SureThing CD Labeler 4 program is backwards compatible meaning it will support the design files created from DesignExpress/CD Stomper (*.dsn) and SureThing version 2 and 3 (*.std). » Top Q: What image file formats is supported in the SureThing CD Labeler program? A: Here is a list of the image file formats that the SureThing CD Labeler program supports... Bitmap (*.bmp) JPEG (*.jpg) Paintbrush format (*.pcx) Portable Networks Graphics Format (*.png) Tagged Image format (*.tif) Windows Metafile (*.wmf) Encapsulated PostScript (*.eps) » Top Q: How do I get metric settings to appear in the SureThing program? A: To get the ruler to display in metric (e.g. cm), you will need to set the Windows' Regional setting to your country or English (United Kingdom). Click on the Windows Start menu and select Settings, Control Panel. Double click on the Regional Settings or Regional Options icon. Select the country in the Regional Settings drop down menu, then click Apply, OK. Now, the SureThing program will display numbers for the ruler reflecting the country measurement setting. » Top Q: What are the mvstcdxx.lst files??? A: This file, mvstcdxx.lst, is created when you browse for an image in the SureThing CD Labeler program. The program creates this file to keep track of the directory and image that you use so the next time you try to access it, this file will allow the SureThing program to access the image faster. There is no harm in deleting this file. » Top Error Messages Q: Kernell32.dll or User32.dll error when running the SureThing program. A: Users who installed or use a Microsoft wireless optical mouse may experience issues or crashes (stack fault in module KERNELL32.DLL or USER32.DLL) when running the SureThing program. This is a mouse driver issue for the Microsoft wireless optical mouse. Uninstalling the 4.1 IntelliPoint software for your Wireless Optical Blue mouse software seems to fix the issue. The wireless mouse will still work if you just un-install the Microsoft IntelliPoint 4.1 software. You may receive this error also if you have an Nvidia video card. You can update the Nvidia Detonator video driver from the Nvidia manufacturer web site at: www.nvidia.com » Top Q: Invalid Page Fault in module MFC42.DLL A: There could be a corrupt file within the SureThing/CD Stomper software likely causes the MFC42.DLL error message. Use the following steps to resolve this issue: 1. Run Scandisk on the hard drive. The Scandisk utility will check your hard drive for errors. Scandisk is capable of correcting errors it discovers. To run Scandisk, use the following steps: Click Start, and point to Programs. Click Accessories, and System Tools, and then select scandisk. Follow the screen prompts. Once Scandisk is finished, try running the SureThing program. 2. Un-install/Re-install the SureThing/CD Stomper program. Click on the Windows Start menu and select Settings, Control Panel. Double click on the Add/Remove Programs icon and scroll down the list to select the program, then click on the Add/Remove button to begin un-installing. After the program is removed, run the installation from the program CD. Be sure to restart the computer before running the program for the first time. » Top Q: Not responding or seems to hang during the installation of the font files. A: This problem can occur due to several reasons. The Windows Font directory could be in use or not accessible so the installation cannot proceed further with the install. If you have other programs running such as an Antivirus program, try disabling them before running the SureThing installation. If you continue to experience difficulty with the installation, then you can try restarting the computer in Safe Mode to run the installation. To do this, power on or restart the computer. During the memory Check in Command Prompt, press the F8 key repeatedly until you receive a menu that allows you to boot up in Safe Mode. While in Safe Mode try running the SureThing program installation. This will tell us whether there is a program/resource conflict that prevents SureThing from installing. After the install, restart the computer to return to the Normal Mode. » Top Q: I received a 'CRC - Cannot Initialize Installation...' or 'Not a valid Win32 application' error message when I try to install the program from a downloaded file. A: The "Cannot Initialize Installation. (CRC)" and "Not a valid Win32 application" error message means that the download file is a bad download. This issue happens every now and then depending on the host/network that you go through to download the file. After downloading a file, as you begin to run the install it runs a CRC check to make sure the file is the same file that it left from the original computer. You will receive this error if the file is corrupt or the file size doesn't match up with the original. The solution is to delete this bad download file and try downloading the file again. » Top Q: I get an error message when I try to install SureThing CD Labeler 3.0 A: If you get this error message: "Cannot find file c:\program files\surething\50comupd.exe" Cancel the installation and go to http://support.microsoft.com/support/kb/articles/q186/1/76.asp Download and run the com50upd.exe file. Now install SureThing. My Installation hangs during the install of the fonts. If you are using Windows XP Pro, Windows 2000, or Windows NT you need to make sure that you are logged on with administrative rights. Since fonts are considered "system" files, and the installation procedure for SureThing updates the fonts, one must have administrative rights to complete the installation. If you are using Windows 95, 98, or 98se and the install hangs on font installation, quit the install, and restart your computer. Now try the install again. » Top Q: I get an error message when I try to install the patch. It says something about mvstcdxx.lst and not being valid. A: No worries! All you need to do is un-install SureThing and re-install it from the CD. To un-install SureThing, click on Start, Settings, Control Panel. In the Control Panel, double click on Add-Remove Programs. Select SureThing CD Labeler, choose to un-install it, and use the automatic function. Once the program is un-installed, restart your computer. Once the computer is re-booted, insert the SureThing CD into the CD Rom and install SureThing. Now you can successfully install the patch. » Top Q: RASAPI32.DLL error message occurs when starting SureThing 4. A: Unfortunately, the SureThing CD Labeler 4 program is not compatible under the Windows NT operating system. This program version is supported under Windows 98SE, ME, 2000 and XP. » Top Q: I get an error message when I try to start SureThing, what can I do about it? A: First please make sure you have the latest version of SureThing by downloading the latest patch. Your best bet now is to restart your computer and try to start SureThing. Once you download the patch please install it, (double click on the file, and it should automatically install itself).If you have trouble installing the patch, you may need to un-install the program and then re-install from the CD. Then install the patch. If the patch doesn't help... Try this, (a little trick that might work). Right click on your desktop and choose Properties. This will open the "display properties" dialog box. Now click on the Appearance tab. In the "Scheme" box choose "Windows Default" or "Rainy Day". Click Apply and then click OK. Now try starting SureThing again. » Top Q: "Write error, disk full" received when trying to save a design. A: When receiving a 'write error, disk full' error message this usually means that one of the images in the label design was not properly inserted either through the Backgrounds or Picture Tool option. Commonly, I see this error coming from images that are copied and pasted from programs such as Microsoft Publisher. The image doesn't have a file format. Try copying and pasting the image into an image editor like Adobe Photoshop or Paintshop Pro and Save As a supported file type to insert into SureThing. I would insert the image using the Picture Tool from the Picture/Clipart menu. » Top Printing FAQs Q: Printing full face cd on a Signature cd printer? A: You can actually increase the printing towards the center of the CD label in the Signature printer driver. First, check on the Primera Technology to download and install the latest cd printer driver for your Signature model. To access this printer driver setting, click on the Windows Start menu and select Settings, Printers (in XP, select Printers and Faxes). Right click on the CD Color printer icon and select Properties. On the General tab, click on the Printing Preferences button. On the Layout tab, click on the Advanced button to scroll down in Clipping Options. Set the 'Clip Inner Circle' to No and click OK to accept the setting. In the SureThing program, there isn't a feature that allows you to change the center hole of the label but you can print with the 'clipping' turned off. This will print the background image as a square and all the way towards the center (so you might get ink on the cd tray). Click on the File menu and select Print. Next, click on the Advanced button and uncheck the 'clip graphics and text to label boundaries' box then click OK and continue to print. » Top Q: How do I create a Print File (*.prn)? A: To make a print file (*.prn), click on the File menu and select Print. On the Print menu, click on the Advanced button located in the bottom left hand corner. Put a check in the 'Print to File' box, then click OK and continue to print. A pop-up menu will appear allowing you to specify the name of the print file. Usually the default directory where it creates and saves the print file is in the SureThing program directory or you can do a search for this print file (Windows Start, Find, Files or Folders). » Top Q: Received an "Error: invalid font - Offending Command" error message. A: This is usually an error message that involves the printer driver software (mainly with PostScript drivers and laserjet printers). You can try printing with the SureThing clipping feature disabled to see if this help reduce the workload for the printer driver. Click on the File menu and select Print. Click on the Advanced button and uncheck the 'clip graphic and text to label boundaries' box, then continue printing. » Top Q: How can I print a Date on my labels? A: The 'Print Date' field will allow you to print out the date from a saved design file based on the computer system's date. To use this field in the label design, click on the Insert menu and select Insert Field. Scroll down in the Field Type and select Print Date. Select one of the (auto) fields in the Data field on the right hand side, then check the New Frame box before clicking on the Insert button. Once the date is insert, click Close. Now you can save the design file. When you open the design file at a later date, you will probably see the old date, but when you go to print, it will print out the computer's date. » Top Q: Can't preview a label design with an EPS image? A: The design file that you have using an EPS image in it doesn't display the image because the EPS file itself doesn't have the Preview option saved with the image file. For instance, if you have an EPS file that is enabled with Preview, then you should be able to view the image. The SureThing CD Labeler program just reads the file, but in order for it to display the EPS file, the setting for the EPS Preview has to be enabled and saved with the image file. Also, in order to print this EPS image with the design, make sure you have an PostScript printer driver installed for the printer. If you don't have a PostScript printer driver, the printer will not print out the EPS image format. I have also included the design file with the image as *.wmf format. I test printed a couple times and the 'field 2' for the name doesn't change to 'field 1' or another field. When you go to print the whole merge file, there are some design that contains a lot of information, which causes the red "overflow" underline in the text box. This means that there is more information that the text box is unable to display. To get rid of the red underline, you can reduce the size of the font or make the text box bigger to accomodate the text information. » Top Q: Printing from a laserjet printer gives me a black printout. A: Sounds like you have a laserjet or a printer with a PCL type printer driver. This type of printer driver doesn't handle the 'clipping' feature in the SureThing CD Labeler program too well and will print out your labels in all black. A resolution around this is to uncheck the clipping feature. Click on the File menu and select Print. Select the Advanced button in the bottom left hand corner, then uncheck the 'clip graphic and text to label boundaries' box, then click OK and continue printing. You can also look on the printer manufacturer's web site for a 'non-PCL' printer driver to download and install. » Top Q: Are you printing out in landscape mode instead of portrait? A: This is usually an issue of having the Orientation field set to 'Landscape' in the printer driver. First, we'll check the printer driver settings, then we can check from the SureThing program. Click on the Windows Start menu and select Settings, Printers. Right click on the printer that you are using to print and select Properties. Browse through the tabs and look for the Orientation field (setting it to 'Portrait', then click Apply, OK.). Now, in the SureThing CD Labeler program, click on the File menu and select Printer Setup. Make sure the printer that you are using is selected for the Default Printer option and the option is set for this Default Printer, then click the Options button. Again, browse through the tabs for the Orientation and setting it to 'Portrait'. You can also visit the printer manufacturer's web site to download and install the latest printer driver for your printer model. Removing your old printer driver software and installing new printer drivers will set the settings to their default values. » Top Q: My printer takes too long to print OR the printout does not resemble the design on the screen. A: These problems can occurs from several reasons. 1. Your printer has trouble with our ink saving "clip to label" feature. To remedy this problem in SureThing 2.0 click on File, Print and uncheck the box that says "clip graphics and text to design to label boundaries". 2. Download and install the latest drivers for your printer. The latest printer driver software can be found on the printer manufacturer's web site. 3. You could be using images that are too large to print. This is where we need to shed some much needed light regarding digital images and printing. The fact of the matter is, you don't need more than 200 dpi for printing purposes. If the size of the image is 5 inches by 5 inches and when you print the image on paper it's 5 inches by 5 inches, you will only need 200 dpi to print the image at the max resolution your printer can handle... here's why A printer's resolution is much different than the screen resolution of your monitor. Printer manufacturer's like to be able to "play up" the capability of their printers. Rather than tell you the real number the printer is capable of, they tell you a close to the truth number. Here's how it works. A certain printer says it's capable of 1440 dpi. In actuality it is capable of 180 dpi. Confused? Here's an explanation... The printer prints two dots of every color it has for each single dot of actual output. Take that 1440 number and divide it by 8. (the number of colors it uses times 2 (for each dot)). You get 180 dpi. Other printer manufactures only use one dot per color so you would simply divide the advertised resolution number by the number of colors the printer uses. Either way. Even the best ink jet printers out there don't do better than 200 dpi. This explanation may cause many people to be upset, or contend that when they print their image out in "brand name image editor here" at full 600dpi resolution, the print looks better. This, however, is simply not true. With the best printer available, if I take an image sized at 8 x 10 inches, and 600 dpi and print it, and then take that same image, re-sample the image at 200 dpi and 8 x 10 inches, and print it, I will have two identical images. WHY? Because your expensive image editing program, re-samples the images on output. Why do they do this? Because the programmers of this great program know the inherent capabilities of printers, and they would like to minimize print time. It's that simple. The reason SureThing takes so long to print these large images is because it does not resample the images, the reason why is because it has a much simpler imaging engine (thus it's not so expensive). » Top Q: When I try to print, my image is squished. A: There are two common answers for this problem. 1. Your printer is not feeding the paper through the print path correctly. Sometimes different papers will not feed correctly with through the printer. This could be cuased by a bad printer motor, dirty rollers, or paper that is so smooth that the rollers can't feed it. 2. This is also a common problem for people who have scanned images into SureThing. In most cases this is caused by the fact that the image scanned has white space around it. To rectify the problem re-scan the image. This time use the scanner's cropping tool to select the exact area you want to scan. Hopefully you will eliminate the white space around the area you are scanning. Now the image will fill the design area properly. Note: If you are scanning a rectangle and the design area is a square, the image will be squished, as SureThing will fit the image within the design area. » Top Q: How do I print multiple copies of the same design? A: With the design open, click on File, Print. This will launch the Print dialog box. In the Print dialog box there will be an option for Number of copies to print. Increase the number of copies to the ammount you would like to print. You can also select the option for printing pages at a time. If you select this option the program will print as many copies of the design as can be held by a page. (if you choose to increase the number of pages, it will fill all of the specified pages). » Top Q: How do I increase the center hole for my Bravo Disc Publisher cd printer? A: You can increase the printing towards the center of the disc by decreasing the Inner diameter field from the Calibration Options. To do this, make sure that you have the label design open in the SureThing program and go to File, Print. Click on the Options button to open the Properties menu for the Disc Publisher. Click on the Printing Preferences button and scroll down to click on the plus sign next to 'Calibration Options'. Set the Inner diameter field to the lowest value which is 150, then click OK to accept the setting and continue to print. » Top Design FAQs Q: New to the SureThing CD Labeler program? This will help... A: There is a tutorial that explains the features in the program to help you familiarize with the program (click on the Help menu and select SureThing Tutorials). Quick steps to begin creating a label design... Open the SureThing program. Click on the File menu and select New. In the Product Types list, select the category of paper that you will be using (such as CD/DVD Label) and choose the label sheet template from the Label Products list, click Next to continue. The SmartDesigns step will allow you to click on the 'Browse' button to choose one of the SureThing's background images and SmartDesign layouts which are the pre-set text and objects giving you ideas on how you can layout the style of the label design to use with the label. If you don't want to use a background at this point or want to use your own, click Clear Background. If you want to begin with a blank design, uncheck the 'Use SmartDesign' box then click Finish. Once you finish out of the New CD Wizard, there will be a label on the screen which you can begin designing your label design. » Top Q: How do I rotate a text box for a cd jewel case back panel? A: First, add the text box as you normally would by clicking on the Text menu and select Create Text Frame. Delete any unwanted text information and Type in the text that you want in this text box for the spine. When finish, right click on the text box and select Object Properties. Click on the Properties tab and select 90 from the Rotation field, then click OK. Now the text box should be vertical. Right click on the text box again and select Object Mode. The text box should be outlined in red, this allows you to resize the text box and move it to the spine area. Repeat this step for the other spine and rotate it 270 degrees. » Top Q: How do I access both Letter and A4 size templates??? A: You will need to set the paper type to 'Both' from the Program Options menu in order to access both Letter and A4 size templates. To do this, click on the Tools menu and select Program Options. On the Program Options tab, select 'Both' for the Paper Type drop down menu, click OK. Next, go to File, New to choose the category and select the label template. » Top Q: How do I enter text onto my design? A: There are two different ways to work with Text information (regular Text Frame and Text Effects). I will explain the differences between these two features. Text Effects are the styled text which you can choose a style (curved, angled, special effect) and add bold/shadow to it. This feature is mainly used for 'title information' or text that is displayed in a circular format. To create a Text Effect, click on the Text Effects icon and select Use Text Effect Wizard (recommended) to use the wizard in making a text effect. To edit a Text Effect, double click on it and you should receive a Text Effect menu with four tabs (Position, Effect, Type, Samples) which you can edit the Text Effect with. Text Frame is basically a regular text box displaying text. Nothing fancy. To create a regular text box, click on the Adding Text icon from the left hand side and select Create Text Frame. This will add a text frame on the label with 'Your Text Here' which you can delete and add your own text information. To edit the text information in a regular text frame, make sure that you are in the Text Mode (you will see a flashing cursor in the text box). If you have text in the box which you want to change the color or font, then you can either be in Text Mode and highlight all the text information and go to the Format menu and select Character. Or you can be in the Object Mode (this will give you a red outline around the regular text box), then go to Format, Character to make the editing changes. In a regular text frame, you can switch between the two Object and Text Mode by right clicking on the text box and the menu will give you the opposite mode. For example, if you are in Text Mode and right click on the text box, you will see Object Mode list for you to select. Vice-versa. » Top Q: How do I apply a text wrap to my text box so it will stay within the label? A: To enable the 'Text Wrap' box in this SureThing 4 program version, first insert a text box by clicking on the Text menu and select Create Text Frame. You will receive a text box with the words "Your Text Here" which you can delete and insert your own text information. Next, go into the Object Mode to resize the text box to a larger size (you can always resize it down later). To go into the Object Mode, right click on the text box and select Object Mode. Click and drag on a corner of the text box to increase the size. Once you have a larger size text box, right click on the text box again and select Object Properties. On the Properties tab, put a check in the Wrap Text box then click OK. If this box is not lit up, you may need to increase the size of the text box. » Top Q: How do I set a default font in the current design file that I am working on? A: First, you would need to create the text box with the text style and format that you want to use. You can use the 'Default' feature to set the font formatting for all new text boxes that you create later on. For example, create a new text box by clicking on the Adding Text icon and select Use Text Frame Tool. Place the mouse cursor on the label and click and drag to create a text box. Go to the Format menu and select Character. You can enter in the format settings that you want for this text box. To set a default setting for new text boxes that you create later, right click on this text box and select Object Properties. Next, click on the Character button in the 'Set Default' area. Enter the settings that you want and click OK. When you return to the main Text Frame dialog box, you can click on the Properties button, then click OK. » Top Q: How do I duplicate a design in SureThing? A: Once your first design is finished, you can access the second label by clicking on the Next Design link (looks like double right arrows >> ) from the Actions menu on the left hand side. This will prompt you with a message telling you that you have reached the last design and would you like to create a new design? Click Yes. The grey label tab will read 'CD Label (2 of 2)' which means you are on the second cd label. Use the Previous Design link (looks like << ) from the Actions menu to navigate to the previous design if needed. » Top Q: How do I delete a duplicate design in SureThing? A: If you have multiple designs, you can delete the unwanted design by clicking on the Edit menu and select Delete Design OR click on the Delete link from the Actions menu. This will give you a 'Delete Designs' menu to choose the number of designs to delete as well as the starting design. After specifying the design to delete, click OK. » Top Q: Will my old backgrounds be available if I install SureThing 4 over the existing SureThing version 2 or 3 program? A: Yes. You should make sure that you install SureThing 4 into the same directory that version 2 or 3 was installed (but this should be where SureThing default to anyway). » Top Q: How do I make a Jewel Case Insert in SureThing? A: 1. Open SureThing CD Labeler. 2. Click on File, New and select CD/DVD Cases from the Product Types box. 3. Now select the template you wish to use from the Label Products box and click Next to proceed with the New CD Wizard. » Top Q: I created a really cool cd label design and would like to use the same design for a cd jewel case template. Is this possible?" A: It's not only possible in SureThing v.4 but EASY. One of the new features in version 4 is the 'Transfer Design' feature. All you need to do is have the design file that you wish to use and click on the File menu and select Transfrer Design to choose the desired template then click OK. » Top Q: How do I curve my text? A: Curved Text is a feature of Text Effects. 1. Click on the "Text Effects" button. 2. Choose "Use Text Effect Wizard". 3. Select the "Circular Text" option. Click Next. 4. Select "Sizeable" option. Click Next. 5. Choose a color setting. Click Next. 6. Enter your text into the "Enter Text" box. 7. Click on the Preview button to view a preview of your text. 8. Click "Finish" when you have everything set. » Top Q: How can I add a symbol in Text Effects? A: Here are some steps that you can use to add a symbol such as the 'Copyright (©)' symbol into a Text Effect... 1. Create a regular text box to insert the symbol by clicking on the Text menu and select Create Text Frame. Hit the 'Delete' button from the keyboard to remove the Your Text Here from the text box. 2. Click on the Text menu and select Insert Symbols to choose a symbol and click Insert. Next, click on the Close button when the symbol is added into the text box. 3. Go to Edit and Select All. Go back to the Edit menu and select Copy Text. 4. Now you can create the Text Effect to paste in this copied symbol. Click on the Text menu and select Add Text Effect. Go through the wizard and on the last step in the Enter Text field, remove any text such as 'Sample'. You can paste in the symbol by holding down the Control (Ctrl) and V-keys from the keyboard. Add any additional text information and click Finish. Congratulations, you have added a symbol into a Text Effect. » Top Q: How do I insert a SureThing background? A: This is an easy one! Click on the Backgrounds menu from the left hand side. Choose "SureThing Backgrounds". Select one of the backgrounds folders. Double click on the background you like. » Top Q: How do I insert my own background image? A: With a design open, click on the Backgrounds button. Choose "Use Your Own Background" The backgrounds browser should now load. Navigate via the directory tree to the place where your image is stored. Once you select the folder where your images are stored, the right side of the background browser will display images that SureThing supports. Double click on the image you wish to use. » Top Q: How do I open my label image in other programs? A: You can use the Export Design feature to save the label as a Bitmap (*.bmp), JPEG (*.jpg) or a TIFF (*.tif) image. Once you export the design, you can open the file in a program that supports these formats such as Adobe Photoshop, Paintshop Pro. » Top Q: How do I use my scanner to import an image into SureThing? A: With your design open click on File, Scan Images, Acquire Image or Acquire Images as Background. (if you're going to use the image as a background for the design) Your scanner software will now be launched. Prescan your scanner bed and select the area you are going to scan. Make sure to use the selection tool to select the exact area you want to scan. If you do not do so that whole scanner bed will be scanned, and the image will appear really small with lots of white space around it. Please make sure you use the scanner software's selection tool to select exactly the area which you wish to scan. Once the scan is complete the image will load directly into SureThing. If your scanner software is having trouble with SureThing, you might want to check to see if there are better drivers available for your scanner. Check the manufacturer's website to see if there is new software to download. » Top Q: Why can't I set a background for the Back of my Jewel Case booklet??? A: You CAN! set a background for the back of your Jewel Case booklet. 1. Click on the Backgrounds button. 2. Choose "Background Properties". 3. The Background Properties dialog box will appear. Check the box next to "Use background on both sides". Click OK. OR you can insert a different image for the Inside of the booklet with the use of the Picture Tool. » Top Q: When I insert my own background it looks warped or stretched, how can I fix this? A: Usually SureThing defaults to stretching the image so that it fits onto the entire design. To change it back click on Properties in the Backgrounds box. Choose Fill Design, Maintaining Aspect Ratio, click OK. If you want to resize the background or move it around click on the Size and Position in the Backgrounds box. You can move the background by left clicking/hold down and drag your mouse on the background. To resize the background left click/hold down on one of the red boxes that appear in the design area. » Top Q: How do I make text readable against a busy background? A: Generally to what is making the text unreadable is that the background switches from light to dark over and over. You can use dark text and you can't use light text. One way to make the text readable is to make it a Text Effect. Text Effects will allow you to add a shadow or outline to the text. Having light text with a dark outline or shadow (or vice versa) will allow the reader to see the text through any busy background. See the text effect section in your manual to learn more about text effects. You can also try making your background lighter or darker. » Top Q: Is there a way to make my backgrounds lighter? A: Yes! Once you have a background selected click on the Backgrounds button. Select Background Properties. Adjust the brightness box. Positive numbers are brighter, negative numbers are darker. » Top Q: How do I insert an image file into SureThing? A: All you need to do is click on the Pictures/ClipArt menu and select browse for Pictures/Clipart. The picture browser will open to it's default location (the Clip Art folder). On the left side of the Picture browser is the directory tree. You can navigate the directory tree to find the place where your images are stored. Once you find the right folder, select it, and the pictures in that folder will be displayed in the browser area on the right side of the window. Double click on the image you wish to insert. » Top Q: How do I make parts of my image appear transparent? A: *NOTE: Transparency ONLY works on Bitmap images (images with the .bmp extention). The transparency tool will take one color on your image and define it as transparent. First select the image that will have a transparent area on it. Select the transparency tool by going into the Tools menu and then select Object Tools, Transparency Tool. Or click on the little Eye Dropper near the top left side of your screen. Now your mouse cursor will turn into the Transparency Tool icon. Move the transparency tool to the color you wish to define as transparent and click on it. Now, if you have a complex image, chances are there are many shades of color similar to the one you are defining as transparent. The are as many as 16 million different colors in an image, so the white you choose to make transparent might be next to lots of other non-white images. So if your image looks blotchy when you use the transparency tool, this is why. What you need to do in this situation is edit the image in another program. Basically you need to paint all the areas that want to be transparent, one color. The paint tool in most image editing programs will work to paint exactly one color in any area you choose. » Top Q: How do you change the color of a CD/DVD symbol? A: First insert the symbol onto the design by clicking on Pictures/Clipart then clicking on Browse for CD/DVD Symbols. Insert your desired symbol by double clicking on it. Next, go to pointer mode and right click on the symbol and choose Object Properties. Click on the Colors tab and uncheck the Display in Full Color checkbox and browse the color that you wish to use by clicking on the Foreground Color pulldown, click Ok once you are happy with the color you have choosen. » Top Q: How do I use my database file with SureThing? A: To use the Merge feature in SureThing, you need to have a Windows Comma Delimited file that serves as your database file. Popular formats are .dbf or .csv. Open your design and click on the Text menu from the left hand panel. Choose "Create Text Frame" and delete any unwanted text information. Now, from the Insert Menu at the top of your screen, choose Insert Field. The Insert Field dialog box will open. Choose the "Merge Fields" tab. Now click on the "Set Merge File" button. This will launch the Set Merge File dialog box. Navigate to find your merge file, select it and choose OK. You should now be able to choose the fields you wish to insert from the fields list. Click OK when you are finished inserting fields. Click on the Print Preview button to view your design with the correct field inserted. » Top Q: How do I insert a serial number or sequence? A: Start a Design and place a text box where you would like to have your serial number. (see the How do I enter text onto my design? FAQ for info on placing a text box.) Place the cursor in the text box and select Insert Field from the Insert menu. The Insert Field dialog box will open. Select the Special Fields Tab, and choose Serial number from the field type box. In the settings box you can choose the start number, max number and increment. You can also choose to have the number reset after every time you print. If you do not wish it to reset, make sure you leave the "reset after printing" box unchecked, and re-save your design after every time you print. Once you have the settings you want, select OK and OK again. You will then see the first number on your design. When you print, depending on the number of copies you print, you will see the different numbers on each subsequent copy. » Top Q: How do I remove a custom template that was saved in the template list? A: To remove a template created from the Template Creation Wizard, follow the listed steps... 1. First, remember the name of the template that was created. This can be accessed when you go to the File menu and select New to look for this custom template. Once you have this name, you will do a Windows Search for this file name. For example, if I created a template named 'custom template' then I would do a Search for 'custom template'. 2. Close the SureThing program and launch the Windows Search feature by clicking on the Windows Start menu in the bottom left hand corner and select Search, For Files or Folders. Set the 'Look in' field to the hard drive such as the C: drive. Type in the template name that you are looking for. 3. Once the Search displays the template name, select the file and hit the 'Delete' key from the keyboard. Now the custom template is removed from the SureThing program. » Top Q: How can I add more fonts in SureThing? A: SureThing supports TrueType fonts that are installed in the Windows Fonts folder. You can get more fonts from a font program such as CombiNumerals PRO (http://www.surething.com/ST/Category.asp?CatCode=FONTS) or from a web site. Most font programs will include details on installing the font files. Here's a general description on installing a font file... 1. Click on the Windows Start menu and access the Control Panel. 2. Double click on the Fonts directory. 3. Click on the File menu and select Install New Font... 4. In the Add Fonts menu that pops up, you can select the drive and folder where the font file is located. Select the font file and click OK. Now you can access the TrueType font in SureThing. » Top Q: I have modified my picture or background using Touch and Effects, I have decided that I don't like what I did, how can I get it back to it's original state? A: Click on Touchup & Effects, at the bottom of dialog you will see a bar that has the last effect that you applied to the image. If you click that bar and choose Original the image will revert back to it's original state. » Top Q: I have some labels that are unsupported in the program, how can I get it to work? A: In the Deluxe Edition SureThing CD Labeler program, there is a 'Template Creation Wizard' that you can use to create a custom template for the unsupported label sheet. The other workaround is to select a similar template and modify the settings in the Page Setup menu. After modifying the settings, you can save these custom settings as a template by clicking on the File menu and select Save As. Select 'Template (*.stt)' from the Save as type drop down menu, then check the Place layout in category box to save in a category like CD Label. Give the template a name and save. » Top Playlist FAQs Q: Does SureThing have Itunes playlist support? A: Unfortunately, this playlist format is not supported. However, it is on our 'to-do' list. Here is a link to the SureThing Forum for a workaround for this inquiry: http://forums.mvd2.com/tm.asp?m=19822&appid=&p=1&mpage=1&key=&language=&tmode=1&smode=1&s=#19822 » Top Q: How do I apply a playlist from a player program such as Windows MediaPlayer or MusicMatch Jukebox? A: Here are the steps to tryout to when trying to access the player for a playlist file... To access a playlist from a player such as MusicMatch or Windows MediaPlayer begin a new design using 'Audio' for the SmartDesigns. Click on the File menu and select New. Choose the label template for the corresponding label sheets, click Next. On the SmartDesigns step, select 'Audio' then click Next. On the last step, select the Import playlist from CD, a file or player option then click Finish. On the Import Playlist menu, choose the option for 'Import playlist from a player or burner' then click OK. At the bottom, you can select the player for the playlist such as Windows Media Player or MusicMatch. In the left hand menu, you can choose the playlist from the list of folders, then click OK. To navigate to a different SmartDesign layout, click on the right arrow of the middle bar located under the label design. » Top Q: How do I use the playlist feature for a MP3 CD? A: The CD Playlist feature in the SureThing program will only access the audio files from the CD media. For files such as MP3s, you can read these files by using the Data CD SmartDesigns. Click on the File menu and select New. Choose the template for the corresponding label sheets, then click Next to continue. On the SmartDesigns step, select 'Data CD' and on the last step make sure there is a check in the 'Edit data playlist' then click the Finish button. When you receive the Edit Active Playlist menu, you should be on the Files tab. Click on the 'Show all available drives' button across from the Indent Folders check box. This will show you all the drives on the computer. Browse in the drive/directory where your files are located and select them, click orange arrow to move the files to the 'Files:' field on the right hand side. When you selected all the files that you want to use, click OK. This should import the file names on your design. If you don't have a field listing these files, you can select another SmartDesign that has this field by clicking on the right arrow in the middle black bar to view another SmartDesign. Hope this helps! » Top Q: I have a playlist entry in the Playlist Manager, how do I add it to my label??? A: 1. First, open or start a new design file. Click on the File menu and select Open to browse for an existing file to open and use or File, New to start a new design. 2. Once you have the design on the screen, make any necessary changes like selecting a background or adding text boxes to the label. 3. To apply a playlist from the Playlist Manager, click on the Playlists icon in the left hand side and select Playlist Manager. In this menu, select the playlist that you want to use and click on the Apply button. 4. Next, click on the Playlists icon and select Insert Playlist Fields. You might want to select the playlist field called, 'Track:Artist' and 'Track:Title' for the track information with the song title and artist. These fields are setup the same way that you can view in the Playlist Manager. For example, on the General tab, you will find the fields: Title, Artist, No. of Tracks, Playtime... (this is for the General CD Information). On the Tracks tab is where you can find the fields that correspond to the song title, artist,... Once you have inserted a field, you will get a text box that looks like {Track:Artist} or {Track:Title}. 5. To display the data, click on the Playlists icon and select Display Playlist Data. Now the playlist should appear on the label design. » Top Q: How does SureThing access playlist information on my CD? A: SureThing has two ways of getting PlayList information from your CD. The first way is through a feature called CD Text. CD Text is a feature that most CD burning software supports. When the CD is made the information is written into a data string for each song. CD Text can hold tons of information, like song title, time, artist, producer, etc... CD Text works best with compilation CD's because it's a feature included with most CD burning software and if you are making a compilation CD, the track information won't be available on the internet databases. If your CD doesn't have CD Text on it (many production CD's don't) then SureThing can go to the internet and download the track information for your CD. This is only possible with production CD's. » Top Q: My burner software doesn't support CD Text? A: That's really sad. Get better software!!! The two most popular programs that we know of are Adaptec Easy CD Creator (now produced by ROXIO) and Ahead's NERO. Easy CD Creator V. 4 and 5, and Nero V. 4 and 5 all support creating CD TEXT. For CD Text to work correctly you must check the box for "Disc At Once". It is available as a burning option in both programs. If this box is not checked when you create your CD the CD Text will not work properly. Here's where you can find these two CD Burning programs. http://www.roxio.com/en/products/cdrpc.jhtml http://www.nero.com/en/index2.htm OK... Here's the lowdown. Easy CD Creator, while it does handle CD Text, it really doesn't handle it well. All it does is enter the title of the mp3 file under the song title heading for CD Text. So you can only edit the CD Text by changing the name of the file. NERO has a far better way of handling it. Yes, it does default to the same setup Easy CD Creator has with the name of the file being transferred into the song title heading of the CD Text for that song. However, when using NERO, if you double click on the song you have inserted into your compilation, you can enter the Artist, CD Title, Song Title, Producer and other information separately. This way SureThing can really read and separate the information so you can choose via smart designs how you would like it displayed on your CD cover. » Top Q: ERROR: ASPI drivers are not configured correctly? A: This is a tough one. This means that the ASPI drivers on your computer are not set up correctly. Make sure that the CD isn't playing when SureThing trys to read it. Download CDEX... (http://www.cdex.n3.net) this program a CD Ripping program designed to allow you to record songs from your CD digitally. Once you have installed the program insert the CD you are trying to read into your CD Rom drive. Now run CDEX. With CDEX running click on the TOOLS menu and select Read CD Text. If there is no CD Text on the CD, the program will tell you. If there really is a problem with your ASPI drivers CDEX will confirm this with an error message. How to fix your ASPI drivers. So far the only one we've been able to get to work with some consistency is through REAL Networks. Go to http://www.real.com/jukebox/index.html?src=011011realhome_2 Download and install Real Jukebox Basic. Once it is installed open it. Click on the Record button. (It's the circular button with the red circle in it near the top left hand corner of your screen). OR click on the Tools menu and select Preferences. Select the Recording tab and click on the Run CD Test button. After testing it may ask you to go to the internet to install new drivers for your CD Rom. This is what will fix your ASPI drivers. Once this is completed you can close Real Jukebox, open SureThing, Start a Design, and click on the CD Contents button to make it look at your CD. If none of this helps you may want to turn off the CD Text reading capability of the program. This will limit SureThing to being able to use only production CDs that are listed on the internet. To do this click on Tools, Program Options, and choose the internet tab. Uncheck the box labeled Read CD Text. » Top Q: Does SureThing support my music player program? If so, how do I use it? A: Yes, SureThing 4 supports the Windows Media Player and MusicMatch player program. To use a playlist from one of these player programs, follow the listed steps... 1. With the design open, click on the Playlists button from the Design Bar and select 'Import Playlist'. 2. Select the option 'Import playlist from a player or burner' then click OK. 3. In the Select Player or Burner drop down menu, click on the down arrow to choose the player. 4. Select the playlist that you want to use from the left hand window then click OK. * If you do not have any playlist fields added to the label, then you can do so by clicking on the Playlists button and select 'Insert Playlist Fields'. On the Playlist tab, you can select the fields to insert then click the Insert button to add this field to your label. For example, you might want to select the playlist field called, 'Track:Artist' which is the field for the track artist and 'Track:Title' for the song title. These fields are setup the same way that you can view in the Playlist Manager. For example, on the General tab, you will find the fields: Title, Artist, No. of Tracks, Playtime... (this is for the General CD Information). On the Tracks tab is where you can find the fields that correspond to the song title, artist,... Once you have inserted a field, you will get a text box that looks like {Track:Artist} or {Track:Title}. 5. To display the data, click on the Playlists icon and select Display Playlist Data. Now the playlist should appear on the label design. » Top Q: How do I insert a playlist field? A: 1. First, open or start a new design file. Click on the File menu and select Open to browse for an existing file to open and use or File, New to start a new design. 2. Once you have the design on the screen, make any necessary changes like selecting a background or adding text boxes to the label. 3. To apply a playlist from the Playlist Manager, click on the Playlists icon in the left hand side and select Playlist Manager. In this menu, select the playlist that you want to use and click on the Apply button. 4. Next, click on the Playlists icon and select Insert Playlist Fields. You might want to select the playlist field called, 'Track:Artist' and 'Track:Title' for the track information with the song title and artist. These fields are setup the same way that you can view in the Playlist Manager. For example, on the General tab, you will find the fields: Title, Artist, No. of Tracks, Playtime... (this is for the General CD Information). On the Tracks tab is where you can find the fields that correspond to the song title, artist,... Once you have inserted a field, you will get a text box that looks like {Track:Artist} or {Track:Title}. 5. To display the data, click on the Playlists icon and select Display Playlist Data. Now the playlist should appear on the label design. » Top Q: How to add more playlist fields into a Circular Effect text box. A: The circular text effects only allow you to insert one field, however, you can get around this by manually typing out the fields you want. Click on the Text button on the left, click Circular Text, on the Set Text tab type in the fields you want. For example you might type this {#}. {Track:Title}{Track:Playtime} and hit OK. Now when you insert your playlist, you will get your track number, title and playtime. Hope this helps! » Top Q: I have Windows Media Player but I am unable to import from it, what is wrong? A: Make sure you are using Windows Media Player 8 or higher before you import. You can get it here: http://www.microsoft.com/windows/windowsmedia/ » Top
|