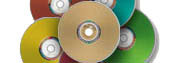
Creating Your First Label Using SureThing
Creating your first LightScribe label and printing should be easy, provided you are using a design tool made for LightScribe. We're partial to SureThing CD/DVD Labeler, so we'll walk you through your first label using it. Follow these steps and you'll be printing your first LightScribe disc in no time.
Step 1: Create a New Project
Choose File>New to bring up the new project dialog:

Click on the LightScribe logo so that you will be sure to have access to all the LightScribe layouts and backgrounds available.
Congratulations! You've created your first label, now for a little customization.
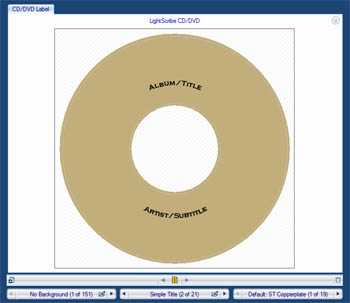
Step 2: Select a Background
Use the SmartDesign tools to select a background:
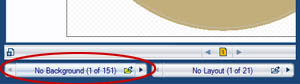
Click on the small folder in the Background select tool to browse backgrounds. The background browser will then be displayed.
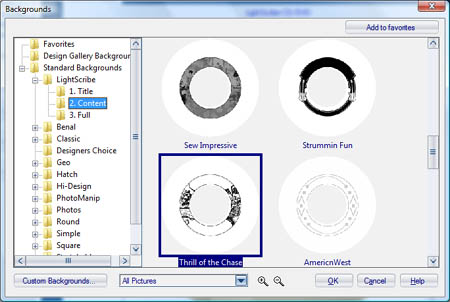
Browse the backgrounds to find one you like, click on it and then click OK. Your background will be sized perfectly to the disc.
For LightScribe, we have navigated to the LightScribe backgrounds on the left panel above. This allows you to select a background perfect for the LightScribe Print mode you wish to use (to learn more, click here). You can use any other color background as well, and SureThing will automatically match LightScribe's gray scales when displayed on the screen.
Your disc is looking better already!
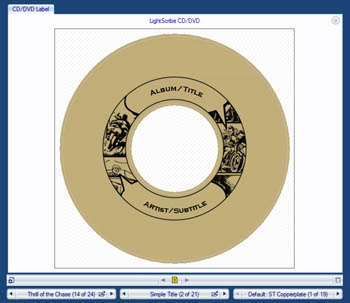
Step 3: Select a Layout
Use the SmartDesign tools to select a Layout:
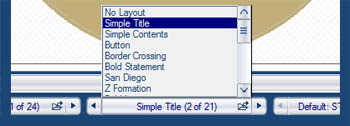
Instead of browsing for a layout, like we did for backgrounds, we'll select a layout from the list (you can browse if you'd like). Click on the middle of the Layout selection tool to pop up a list. You will see the names of the avaiable layouts. We chose Simple Title for this example. You can also click on the arrows to more to the next or previous layout in the list.
Simple Title and Simple Content are designed to work with LightScribe backgrounds of the same name. This gives you the quickest print times for LightScribe. Other layouts and backgrounds look great, but increase the time to print.
Step 4: Add Your Own Text
Next you'll want to change the placeholder text to your own. Double-click on the text object you want to edit. In the case of circular text, you will see the following dialog:
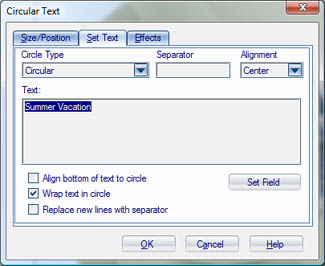
Simply type in your text and click OK. Repeat for the other text object on this design and you're done!

You are now ready to print!
Step 5: Print Your Design
Choose File>Print to bring up the print dialog:
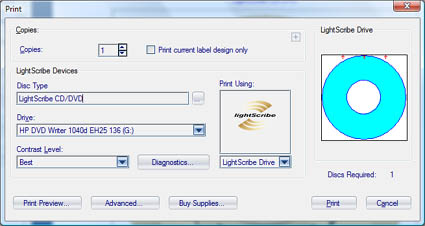
Because you created a LightScribe project, SureThing already has everything set up for you. In most cases, you just need to click OK to get the print started. Be sure to load a LightScribe disc in your drive face down.
If you are lucky enough to have more than one LightScribe drive, you can choose the drive to which you want to print. If you are printing more than one disc, select Multiple Devices and SureThing will use all of your available drives to save a significant amount of time.
That was easy! You can now confidently create your own labels. As you become more familiar with SureThing, you'll find you can do almost anything to make your designs look world class. Enjoy!
|