|
|||
LightScribe Printing 101
Call it printing, burning, or etching, it's all about getting the label on the disc. When printing LightScribe labels, there are a few things that are helpful to keep in mind and some tips and expectations that will help enhance the LightScribe experience. Tip 1: Circular designs
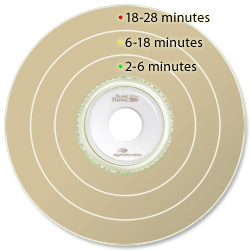
LightScribe prints the label by burning thin rings as the disc spins in the drive.
The more rings that are burned, the longer it takes to complete the label.
Therefore, design elements that span the full diameter of the disc will take
longer to print than those constrained within concentric circles. Individual
designs vary, but we've found the following diagram useful for estimating LightScribe
print times: Tip 2: LightScribe label modes
Use the LightScribe Label Modes to create appropriate labels and optimize print performance. Note: SureThing has layouts and backgrounds that make designing for the LightScribe print modes a snap. Tip 3: Use “Circular Text” Tool
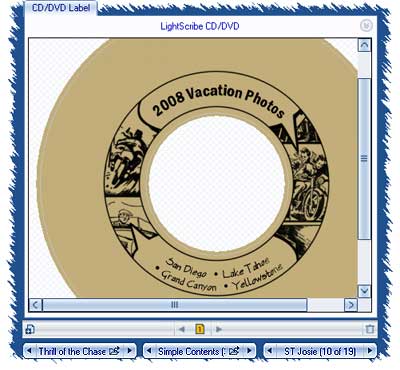
For discs labeled with text only, use circular text to minimize print time. The
text in the first two examples above was created using SureThing’s Circular
Text tool, the easiest way to enter and format text in concentric rings optimized
for faster LightScribe burns. Tip 4: Re-print for darker designs If your disc isn’t as dark as you’d like after printing, use the same disc to print it again. LightScribe will automatically align your disc to match your first print. If you always want your discs darker, you can set it in the LightScribe System Software control panel (keep in mind that this effectively doubles the time to print each disc). |
Articles, Tips and Tricks:
|
||||||||||||||
SureThing Home | Privacy Policy | Contact Us
Copyright © 2009 MicroVision Development, Inc. All rights reserved.


